

In the Produhodontips column this month, Josh Sharpling and Zohaib Ali are discussing the renovation of a implant bridge.
As implant restorations become increasingly common, the ability to renovate the implant bridges (instead of replacing them) will become more and more appreciated than patients. I will discuss a case when I have recently completed and highlight my thinking process.
Implant case
Figures 1-3 show a 90-year-old patient who presented a broken 26-year-old implant bridge. This bridge has been put in place for 24 years without incident. The patient was very happy with it.
About two years ago some of the teeth broke. An intra -abdominal repair was carried out by the patient’s GDP. The patient was generally happy with it, but he always felt that this area was a bit thin.
When the area broke again, he came to see me for a longer -term solution. Her goals were: “I want my teeth back and I want to be able to eat nuts without worrying about my teeth.
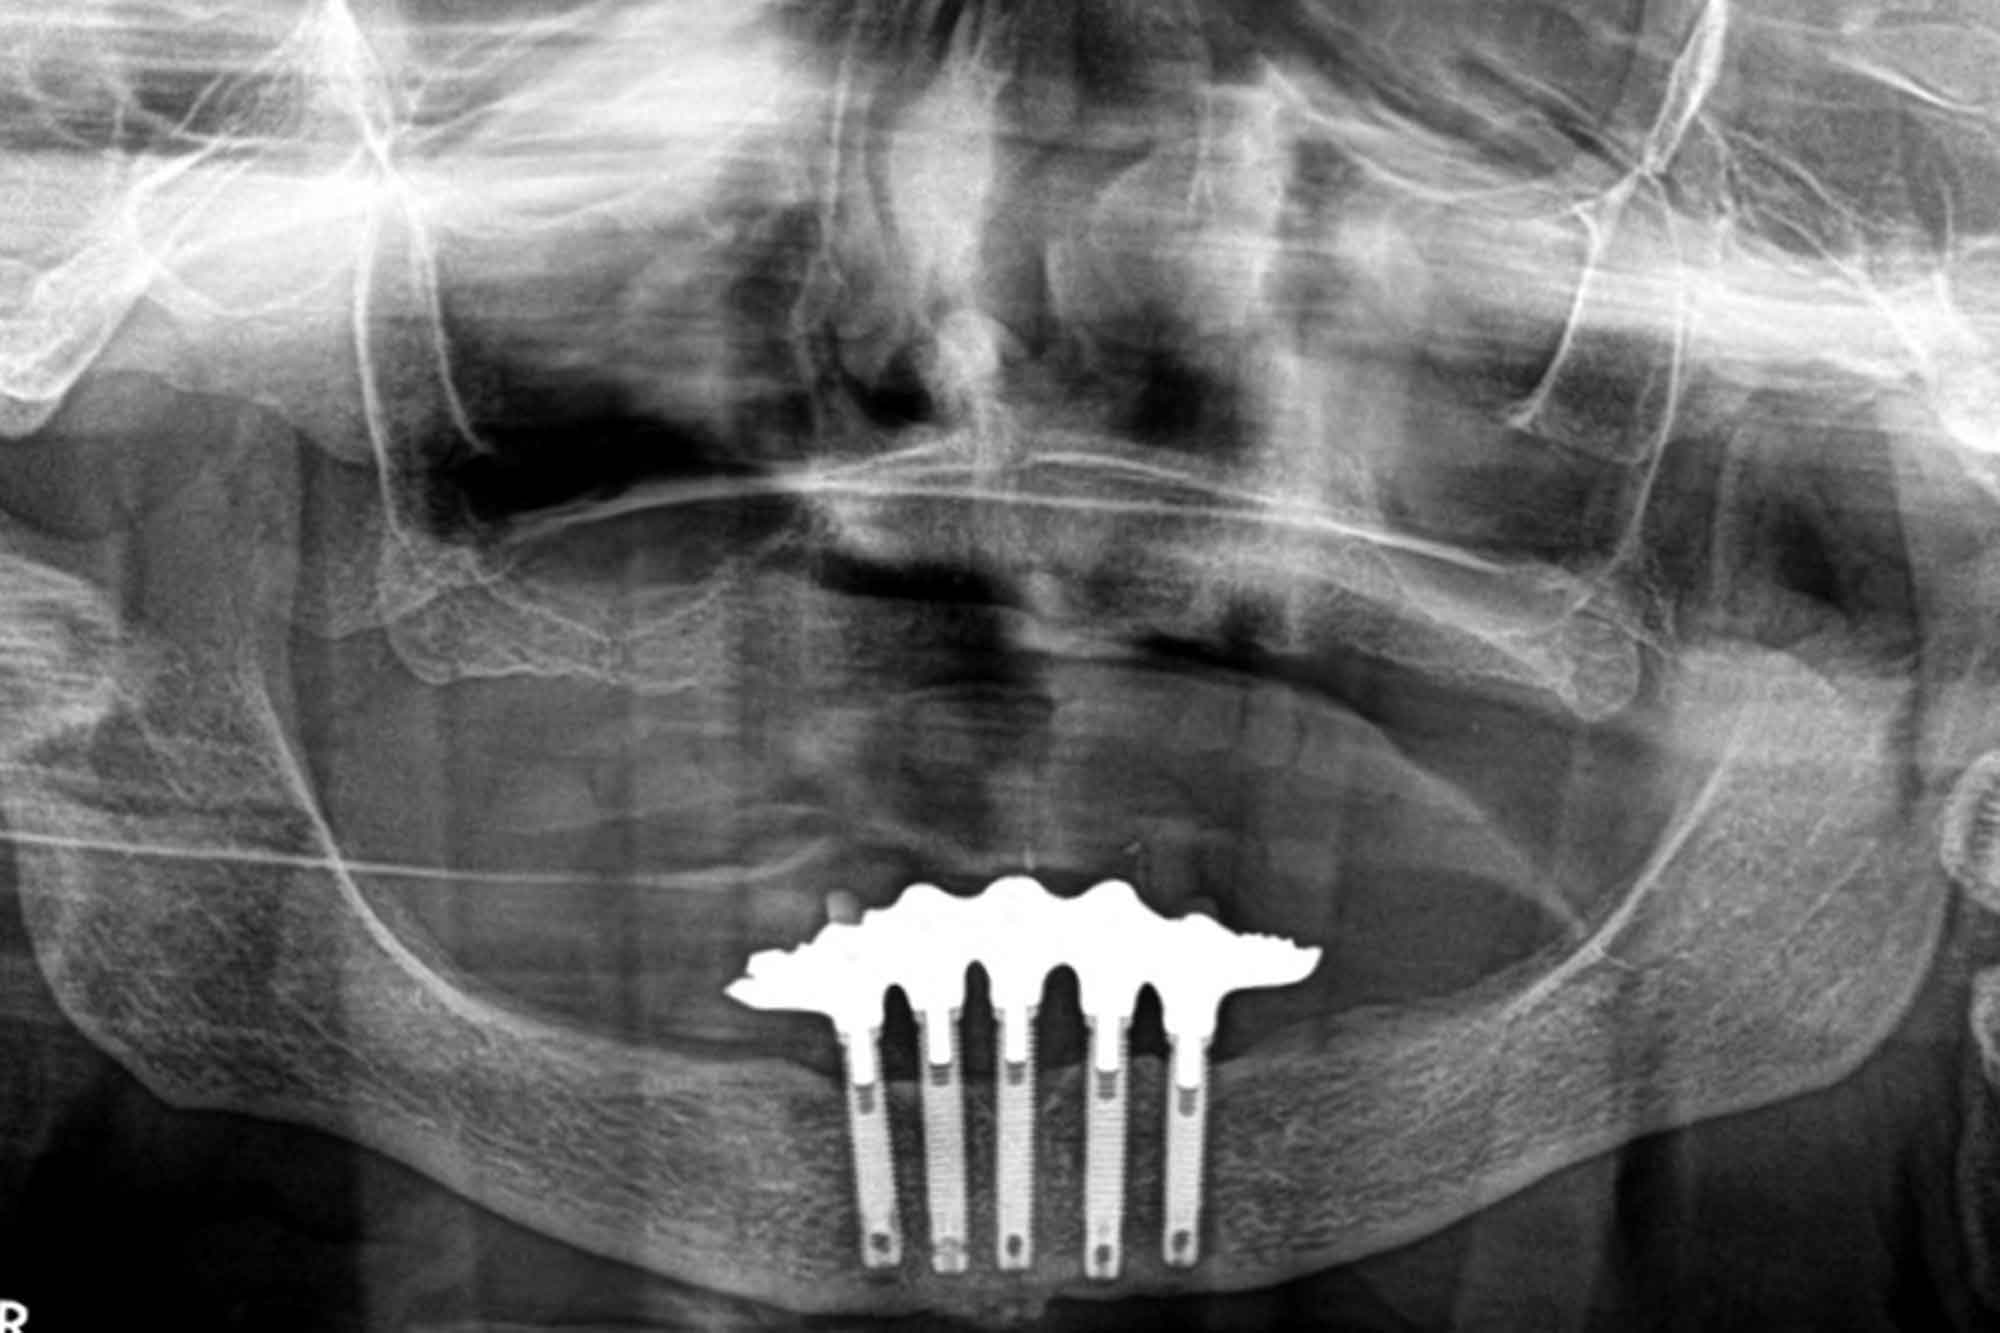
From my discussion with the patient, along with my estimation and x -ray (shown in Figure 4) I was able to know that this patient had been treated with branemark implants and the recovery was an acrylic bridge with a golden frame.
The bridge avoids against a full denture. This explains the minimum amount of wear. This also makes me lean towards the idea that this bridge was broken due to the fatigue of the acrylic, instead of the patient who produces high release forces (the amount of power that can be created by a denture is much lower than with denture or steady implants).
When I discussed the fracture with the patient, he informed me that he always used this area to bite nuts.
Implant therapy options
Knowing the patient’s wishes there were three treatment options I recommended to the patient:
- A new bridge held with implant
- Removing the acrylic from its current bridge, maintaining the golden frame and constructing a new acrylic tooth arrangement
- Renovation only to the fragmented area of the implant bridge.
These are the other options I discussed with the patient, but I did not recommend:
- Treatmentless
- This satisfies the patient’s wishes
- Applying and installing new implants, as
- Bone loss loss and quantity of yarn coincide with the success of branemark implants (bone loss in the first yarn and 1mm per five years later)
- An oral hygiene regime could be successful in maintaining these implants
- Removing these long implants would be traumatic and surgical, and this felt like an overly invasive plan in this case.
The patient did not want a new bridge and was worried about the damage to the gold frame with extensive interventions. So he chose the choice three.
Difficulties
Expected the following possible difficulties with treatment:
- Threaded screws that would make it much more difficult to remove screws
- Screw during removal
- Damage to acrylic or frame during the removal and renovation
- Damage to one or more of implants during the removal of the bridge
- The finding that one or more of the implants was mobile as soon as the chassis frame was removed.
Therefore, when you discussed this option with the patient I informed them of the following dangers:
- Damage to the implant bridge
- This may or may not be repaired
- Damage to implant screws
- Backup screws will order to replace any damaged screws as required
- Damage to implants
- Mobile implants may require their removal and possibly demand the placement of new implants and a new implant bridge.
Friday
Before appointment to remove the implant bridge, I have access to one of the implant screws – to confirm the screw head (and to make sure I had a guide that placed it).
This also allowed me to locate the screws and ensure that I ordered the right backup screws. As I had only access to one screw. If the screw was broken or damaged during removal, I felt confident that the bridge could operate with four screws in the short term.
On the day of renovation, I made sure that a local dental technician could repair the bridge the same day. This meant that the patient was without her bridge for just a few hours. This was vital to the patient and also relaxed many concerns that they were without teeth for a prolonged period.
End result
When the implant bridge was disabled, I was able to irritate the area and remove the available soft plate deposits (pictures 5 and 6).
The bridge was replaced and then the screws rushed to the manufacturer’s recommendations.
Blockage and aesthetics were tested and the patient was pleased to be able to rebuild the bridge and achieve its goals. The end result is presented in Figures 7-11.
Keep the questions coming for the Prothodontips team. You can contact us on Instagram (@sharplingDental and @prostho_zo) and also email ([email protected]).
If there are specific issues you would like to cover in a column, let us know.
Previous Produhodontips:
Follow dentistry.co.uk on Instagram to keep up with all the latest dental news and trends.